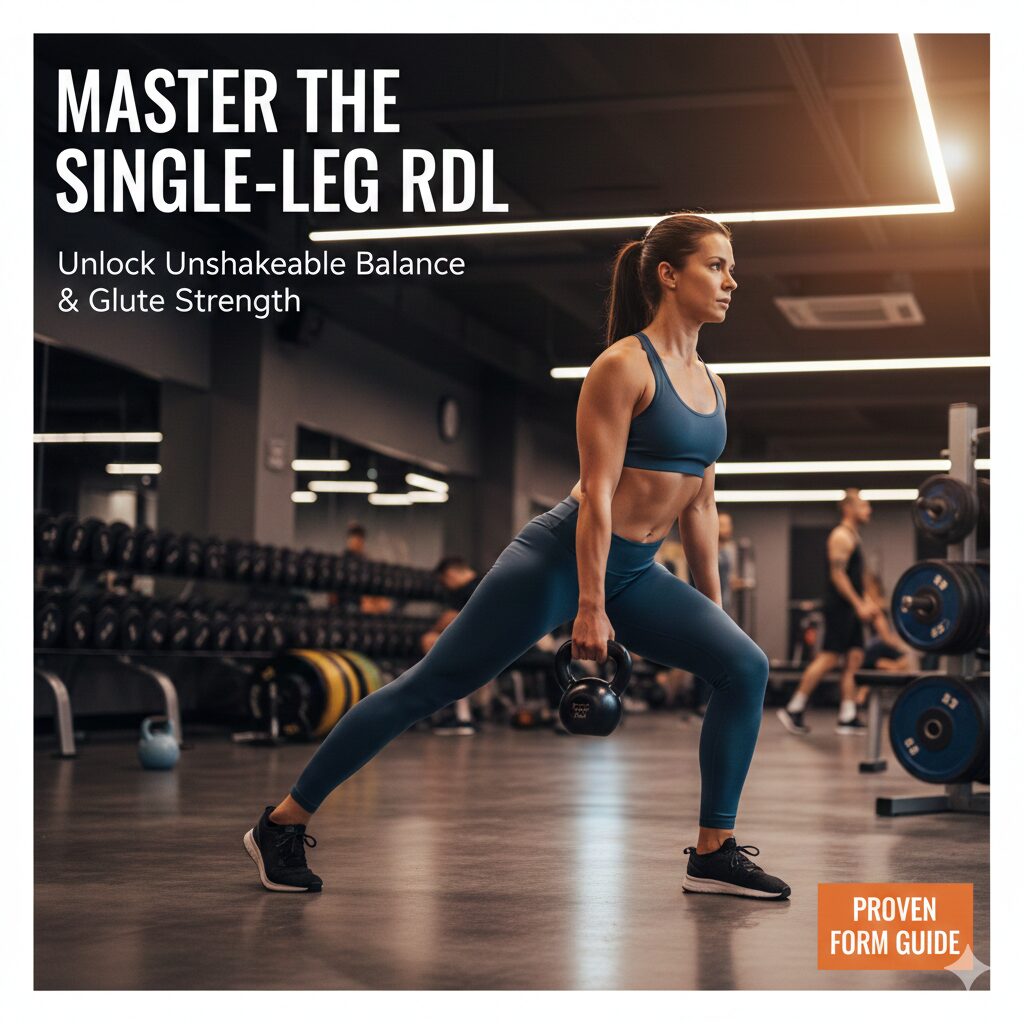
Master the Single-Leg RDL with our ultimate guide. Learn proper form, common mistakes to avoid, and the best variations to build balance and glute strength
If you’ve ever spent time in a commercial gym, you’ve likely seen someone performing what looks like a graceful, slow-motion drinking bird move. They hinge forward on one leg, a kettlebell in hand, looking like a mix between an Olympic athlete and a yoga master.
That move is the Single-Leg Romanian Deadlift (SLRDL).
While it might look intimidating—or like a recipe for falling over—it is arguably one of the most functional exercises you can add to your routine. Whether you want to run faster, lift heavier, or simply stop tripping over the sidewalk, the single-leg RDL is your ticket to better performance.
Why the Single-Leg RDL is a Game Changer
Most of our lives are spent on one leg. Think about it: walking, running, and climbing stairs are all essentially a series of single-leg movements. However, most gym-goers stick to bilateral exercises (two feet on the ground) like squats and standard deadlifts.
By shifting to one leg, you unlock a range of benefits that traditional lifting can’t touch:
-
Correcting Muscle Imbalances: We all have a “strong side.” Bilateral lifts allow your dominant side to take over. The SLRDL forces each leg to carry its own weight, literally.
-
Pelvic Stability: This move recruits the gluteus medius, a small but mighty muscle on the side of your hip that keeps your pelvis level.
-
Iron-Clad Core Strength: To keep from toppling over, your obliques and deep core stabilizers have to fire at 100%.
-
Proprioception: This is a fancy word for your body’s ability to sense where it is in space. Improving this reduces your risk of ankle and knee injuries.
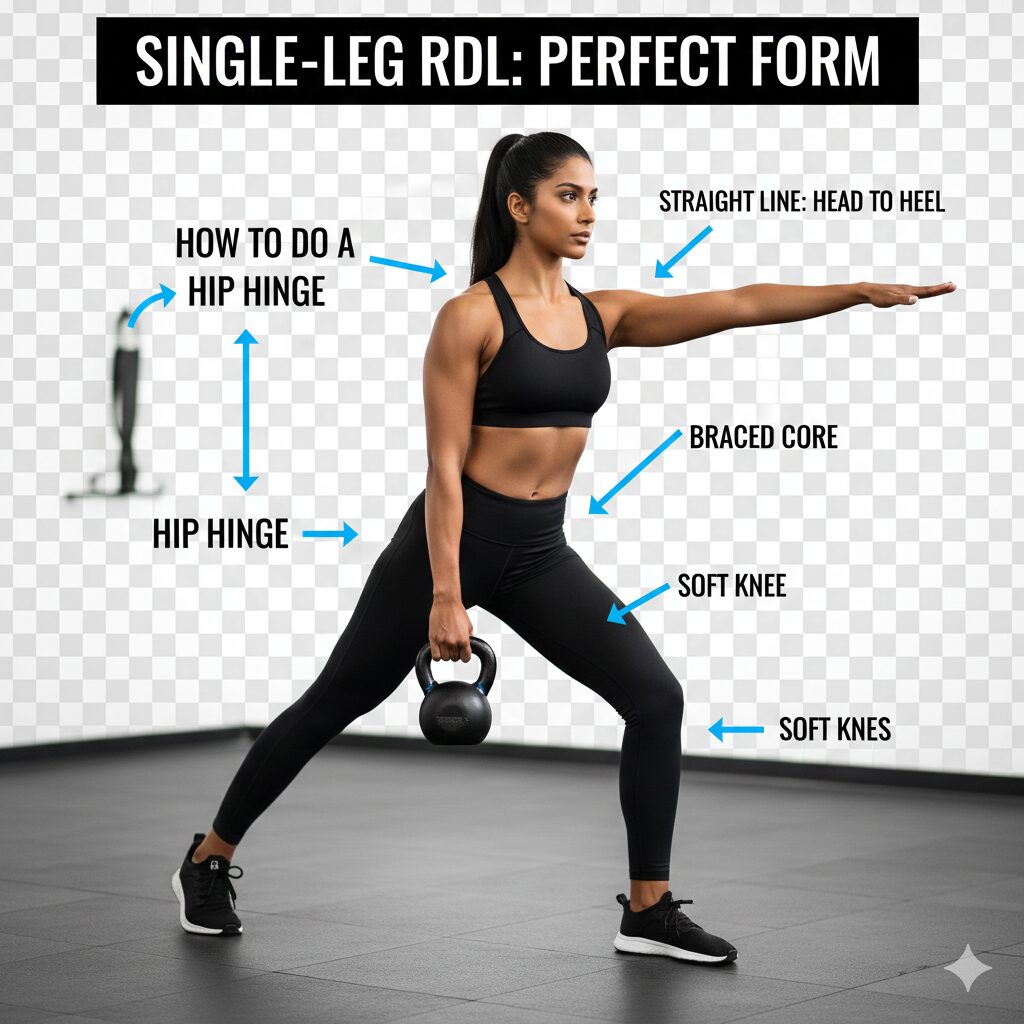
The Anatomy of the Perfect Single-Leg RDL
Before you grab the heaviest dumbbell in the rack, let’s break down the mechanics. The SLRDL is a hinge, not a squat. The movement comes from the hips, not the knees.
Step-by-Step Execution
-
The Setup: Stand with your feet hip-width apart. Shift your weight onto your left leg, keeping a “soft” (slightly bent) knee.
-
The Initiation: Imagine there is a button on the wall behind you. Reach your right heel back toward that button. As your back leg rises, your torso should naturally tilt forward.
-
The T-Shape: Continue hinging until your torso and back leg are roughly parallel to the floor. Your body should form a “T” shape.
-
The Snap Back: Squeeze your standing-leg glute to pull your torso back to upright. Imagine “pushing the floor away” with your mid-foot.
Pro Tip: Keep your hips “square” to the floor. A common mistake is letting the hip of the floating leg rotate upward toward the ceiling. Point your back toes toward the ground to keep your pelvis level.
Common Mistakes (And How to Fix Them)
1. Reaching for the Floor
Many people think the goal is to touch the weight to the ground. This often leads to rounding the lower back.
-
The Fix: Focus on how far your hips can go back, not how far your hands can go down. If your hamstrings are tight, you might only go halfway down—and that’s perfectly fine.
2. The “Walking Plank” Mistake
If you lose the connection between your back leg and your upper body, you lose the tension.
-
The Fix: Think of your head and your back heel as being connected by a rigid steel rod. If the heel goes up, the head goes down at the exact same rate.
3. Too Much Knee Bend
If your knee bends significantly, you’ve turned the RDL into a single-leg squat.
-
The Fix: Maintain a 10-15 degree bend in the standing knee and “freeze” it there throughout the movement.
Programming: Where Does It Fit?
The Single-Leg RDL is versatile. You can use it as a primary strength movement, a warm-up, or a finisher.
| Goal | Sets/Reps | Weight |
| Balance & Stability | 3 Sets of 12-15 | Bodyweight or Light Kettlebell |
| Muscle Growth (Hypertrophy) | 3-4 Sets of 8-10 | Moderate Dumbbell |
| Pure Strength | 4 Sets of 5-6 | Heavy Barbell or Landmine |
Variations to Keep Things Spicy
Once you’ve mastered the basic bodyweight version, try these variations to keep your nervous system guessing:
-
The Contralateral Load: Hold the weight in the hand opposite to your standing leg. This creates a diagonal “sling” of tension across your core, making it harder to stay balanced.
-
The Landmine SLRDL: Using a landmine attachment provides a fixed arc of motion, which allows you to load the movement much heavier while maintaining stability.
-
The “Kickstand” RDL: If your balance is holding back your strength, keep the toes of your non-working leg on the floor like a kickstand. 90% of the weight stays on the front leg.
While they share a name and a basic movement pattern, the Traditional Deadlift and the Romanian Deadlift (RDL) are distinct tools used for very different goals.
For your fitness website, understanding this distinction is crucial for helping your readers choose the right lift for their specific needs. Here is a detailed breakdown of the differences in mechanics, muscle activation, and purpose.
1. The Starting Point: Floor vs. Standing
The most immediate difference is where the rep begins.
-
Traditional Deadlift: This is a “dead stop” lift. Each repetition starts with the weight completely stationary on the floor. You pull the weight up from a dead stop to a standing position.
-
Romanian Deadlift: This lift starts from a standing position. You unrack the bar or pick it up first, then lower it to about mid-shin level before driving back up. The weight rarely touches the floor between reps.
2. Knee Flexion and Hip Hinge
The “shape” of the movement changes based on how much you bend your knees.
-
Traditional Deadlift: Involves significant knee flexion. It is a hybrid between a “push” from the floor (legs) and a “pull” (back). Your shins will typically touch the bar at the start.
-
Romanian Deadlift: Involves minimal knee flexion. The knees remain “soft” (slightly bent) but fixed in place. The entire movement is a pure hip hinge, where the hips move backward horizontally as far as possible.
3. Primary Muscle Activation
Because the mechanics differ, the muscles targeted shift accordingly.
| Muscle Group | Traditional Deadlift | Romanian Deadlift |
| Quads | High (used to “push” off the floor) | Low (knees stay relatively straight) |
| Hamstrings | Moderate | Maximum (huge emphasis on the eccentric/stretch) |
| Glutes | High (for lockout) | High (for hip extension) |
| Lower Back | High (stabilization) | Moderate/High (isometrically held) |
4. Range of Motion (ROM)
-
Traditional: The range is fixed by the size of the weight plates. You go from the floor to full hip extension.
-
RDL: The range is determined by your hamstring flexibility. For most people, the lift ends just below the knee or at mid-shin. Going lower usually causes the lower back to round, which is a common injury risk.
5. Training Intent: Power vs. Hypertrophy
-
Traditional Deadlift: Generally used for absolute strength and power. Since you can use your quads and start from the floor, you can typically move much heavier loads. It is a foundational lift for powerlifting.
-
Romanian Deadlift: Primarily used for muscle growth (hypertrophy) and accessory strength. It emphasizes the “eccentric” (lowering) phase, which is excellent for building the “hamstring-glute tie-in” and improving overall posterior chain resilience.
Summary: Which should you choose?
-
Choose the Traditional Deadlift if your goal is to lift the maximum amount of weight possible, build total-body explosive power, or compete in strength sports.
-
Choose the Romanian Deadlift if you want to specifically target your hamstrings and glutes, improve your hip hinge mechanics, or if you find that pulling from the floor irritates your lower back.
Conclusion: The Path to Functional Strength
The Single-Leg RDL isn’t just an exercise; it’s a diagnostic tool. It tells you immediately if your hips are tight, your core is weak, or your balance is off. While it can be frustrating at first—don’t be surprised if you wobble like a leaf in the wind—the payoff is worth it.
By mastering this move, you aren’t just building a better-looking posterior chain; you’re building a body that is resilient, balanced, and ready for the demands of real life. So, next time you’re in the gym, ditch the leg curl machine for a moment, find a patch of floor, and get to hinging.
Read More
Smith Machine Guide: 5 Science-Backed Benefits & Best Exercises for Gains
Frequently Asked Questions (FAQ)
1. Why do I lose my balance during a Single-Leg RDL?
Most balance issues stem from “gripping” the floor with your toes or looking too far up. Try to distribute your weight evenly across your foot (the “tripod foot” concept) and pick a spot on the floor about 3-4 feet in front of you to stare at.
2. Can I do this if I have lower back pain?
Actually, the SLRDL is often better for people with back pain than regular deadlifts because it requires less total load to fatigue the muscles. However, you must ensure your spine stays neutral. If you feel a “pinch,” reduce the range of motion.
3. Which hand should hold the weight?
For beginners, holding weights in both hands provides the most balance. For an added core challenge, hold the weight in the hand opposite the working leg (contralateral). To specifically target the glutes with more stability, hold the weight on the same side as the working leg (ipsilateral).
4. How often should I perform Single-Leg RDLs?
2-3 times per week is ideal. Because it is a demanding movement for the nervous system and the hamstrings, give yourself at least 48 hours of recovery between sessions.
1 thought on “Master the Single-Leg RDL: The Secret to Unshakeable Balance and Bulletproof Glutes (2026)”